Monthly Archives: April 2016

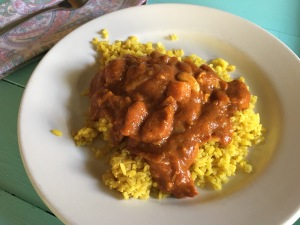
Crock Pot Chicken Tikka Masala

Tikka Masala is something both my husband and I often order at Indian restaurants, though he gets the chicken and I get the paneer (soft cheese cubes). I’ve tried several copy-cat recipes at home and this is one that we’ve enjoyed multiple times. I love that you can cook it in the crock pot because I just don’t always have time to fix something right before dinner, especially on those days when I’m running kids to piano, soccer, scouts, etc.

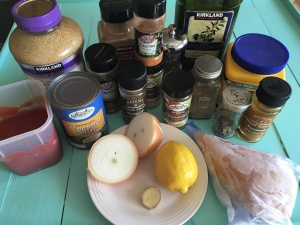
2016-04-20 18.24.42

I also love that this sauce is made from scratch so you don’t need to go to the store and buy jars of sauces. I always have these ingredients on hand, though if you’ve never before cooked Indian or Thai foods, you will probably need to get a few spices like Garam Masala, Turmeric and ground Coriander, which will last awhile.

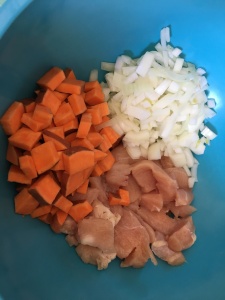
2016-04-20 10.06.12

You can substitute sweet potatoes for chicken, or you can also use both, which I did here because I was too lazy to make my own non-vegetarian dish, just for me, so instead I cook it all together and then I pick out chicken and hand it to my husband or Charles who always love to have extra :).

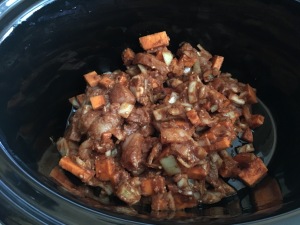
2016-04-20 10.22.54

Once your chicken and veggies are diced, put everything into a greased crock pot. You’ll cook this on low for about  4 hours or high for 2.

2016-04-20 10.52.51

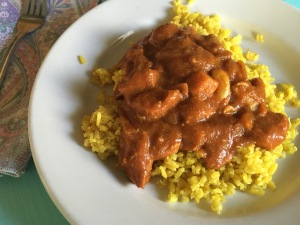
We love this dish over Indian rice and with a side of Naan bread.

2016-04-20 18.25.08

THE RECIPE:

Crock pot Chicken Tikka Masala
*serves 6-8

2 Tbsp olive or coconut oil
.5 lb boneless, skinless chicken breast, cut into 1 1/2 inch chunks (can substitute w/1 cup sweet potato chunks)
1 large onion, chopped
4 garlic cloves, minced or 2 tsp minced garlic
2 Tbsp fresh ginger or 1/2 tsp ground ginger
15 oz tomato sauce
1 can full fat coconut milk (I like the thai kitchen brand)
1 Tbsp Garam Masala
2 tsp ground Cumin
2 tsp ground Coriander
1 tsp paprika
1 tsp turmeric
1/2 tsp cinnamon
1/4 tsp cayenne pepper
1/4 tsp ground black pepper
1/2 c raw cashews or peanuts
1/4 c raisins (optional)

Grease the inside of your crock pot with olive oil. Add all ingredients to crock pot and stir to combine. Cover and cook for 4 hours on low or 2 hours on high.  Serve warm over Indian rice. Leftovers can be stored in an airtight container in the fridge for up to 5 days.

1 Comment

Filed under crock pot, Dinner, gluten-free, vegan, vegetarian

Ranch Dressing

2016-02-02 11.55.32

My kiddos and I are doing a health challenge for six weeks. A friend told me about one that was online and I joined that, and got put on a team, and then the three oldest decided they wanted to do one too. So I edited the spreadsheet so that the goals were a better fit for children (ie “drink half your body weight in ounces of water” instead of ‘drink 100 oz”;  and ‘sleep 9-11 hours’ instead of, ‘sleep 7+ hours’) and they passed them out to a couple of close friends and started on their challenge!  There are two ‘free choice’ spots where they fill in their own healthy habit they want to work on, plus they can choose their own meal plan (but no soda or alcohol is allowed ever, even on your free day). My 11  and 8 year old daughters chose to not have sugar  as part of their meal plan. They are at an advantage living in our home where we have very few things in the home that have sugar in them, but I have not been able to find a ranch dressing without sugar(Newman’s Own is better than most, but the ranch still has some sugar) and they love ranch with carrots and on salads, so I’ve kept it around. I came across a vegan, sugar-free ranch dressing in Kimberly Snyders book and we gave it a try and it’s a winner.

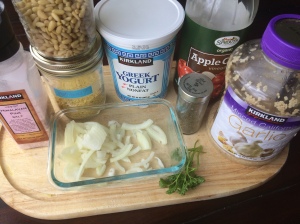
Pictured below, I have plain greek yogurt which is not vegan, but the recipe actually calls for a coconut or almond yogurt, so if you are vegan you’d make that change.

Here are the ingredients: sea salt, nutritional yeast, pine nuts, plain yogurt, apple cider vinegar, minced garlic, onion, parsley and dill.

2016-02-02 11.45.46

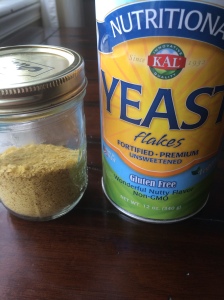
In case you’ve never heard of nutritional yeast before, here is some info about it: Whole Foods sells nutritional yeast in their bulk section, and also in a can like the one pictured below. You should be able to find it in most health food stores. Our local health food store sells it in a canister near the protein powders and vitamin supplement area. Nutritional yeast is grown in vats of molasses, nutrients, and water. Once the yeast is mature, it gets poured out onto a conveyor belt and goes through a drying process that breaks it down into little flakes. Nutritional yeast contains a full spectrum of essential amino acids and is a good source of protein. It has a cheesy, nutty flavor and is vegan so it’s often used as a substitute for vegans, with recipes containing cheese;  I like to sprinkle it on pasta, popcorn, salads, roasted veggies etc.

2016-02-02 11.57.56

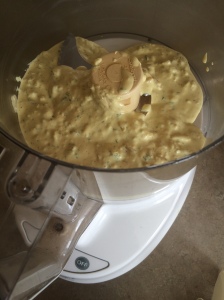
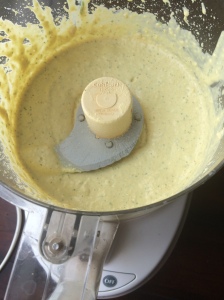
Combine all the ingredients in a food processor and process until smooth.

2016-02-02 11.53.03 2016-02-02 11.54.21

Serve immediately.

2016-02-02 11.56.04

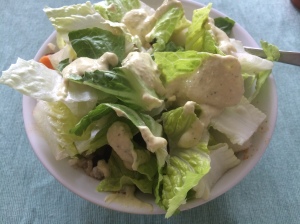
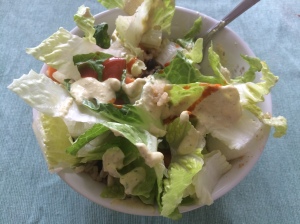
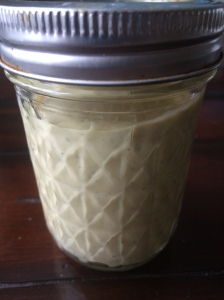
 You can refrigerate  it for about 3-5 days. Just give it a stir before serving. We love to eat this over salad and as a veggie dip. 2016-02-02 12.25.18

THE RECIPE:

Ranch Dressing– adapted from Kimberly Snyder’s cook book
*Makes about 1 cup

2/3 c plain yogurt (can use coconut or almond yogurt if vegan)
1/3 c pine nuts
1/4 c nutritional yeast
2 Tbsp white or yellow onion, sliced
2 tsp raw apple cider vinegar
1/2 tsp minced garlic (1 clove)
1/2 tsp sea salt
1/2 tsp dried dill
1 Tbsp fresh parsley (or 1/2 tsp dried)

Combine all the ingredients in a food processor and process until smooth. Serve immediately. Can refrigerate up to 3-5 days.

2 Comments

Filed under Homemade Staples, Salads, Snacks/Sides/Appetizers, vegan

Homemade Baked Tortilla Chips

2015-11-02 12.05.11

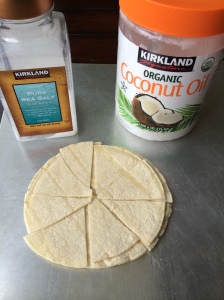
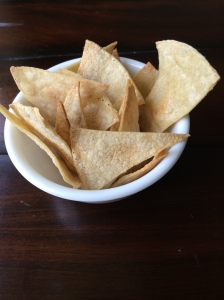
My family will go through a bag of tortilla chips in one sitting, easy. A large costco bag lasts a little longer, but not much, maybe a couple of days, and that’s not good. We eat a lot of Mexican dishes around here and chips go nicely with it, and who doesn’t love salsa and chips anytime of day? But chips, even three ingredient tortilla chips, are usually processed in such a way (fried, high heat) that they shouldn’t be eaten often, or in large quantities. But since I love them so much I decided I’d make a rule for myself. I can eat them as often as I  make them. And you know what, that really works for us! And, because I’m making them, I use good ingredients and I can cook them how I want, and so I don’t fry them, but instead I bake them. You can do this one of two ways:
You can brush your corn tortillas with melted coconut oil, then cut them with a pizza cutter and then sprinkle with sea salt,

2015-11-02 11.45.25

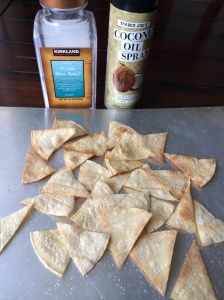
or you can spray them with coconut oil spray or Pam, then cut and then sprinkle them with sea salt. I prefer the coconut oil over the spray because it’s less processed and there is no propellant in there as there are in sprays, but spray is a little faster, so you can choose.

2015-11-02 12.03.49

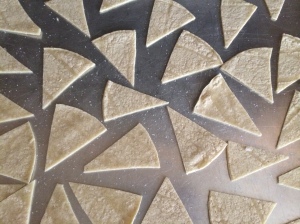
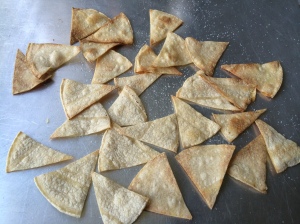
Spread out the unbaked corn tortillas on a cookie sheet, so that they’re not touching, and broil them on high for about 2-3 minutes, then pull them out, flip them over and return them to the oven for another about 1-2 minutes. Do not leave your kitchen as they bake and WATCH CAREFULLY as they can quickly turn from crunchy brown to burnt!

2015-11-02 11.49.12

2015-11-02 12.03.29

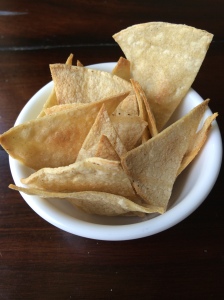
We divide these up with dinner, each person getting a handful, and there are never any leftovers. When you bake them yourself, there is more portion control which is a really good thing for our family who tends to go overboard when it comes to chips :).  Feel free to double this recipe though, and cook them on a couple of cookie sheets.

2015-11-02 12.05.21

THE RECIPE:

Homemade Baked Tortilla Chips
*makes 32 chips

4 corn tortillas
1 Tbsp coconut oil, softened or melted
sea salt to sprinkle on top

Brush corn tortillas with coconut oil(or spray them with Pam).  Cut them into 8 triangles using a pizza cutter, spread them out on a cookie sheet, so that they’re not touching, and sprinkle with sea salt. On the top cooking rack, broil them on high for about 2-3 minutes, then pull them out, flip them over and return them to the oven for another  1-2 minutes. WATCH CAREFULLY as they will quickly turn from brown to burnt!

Leave a comment

Filed under Snacks/Sides/Appetizers

The Best Whole Wheat Pancakes

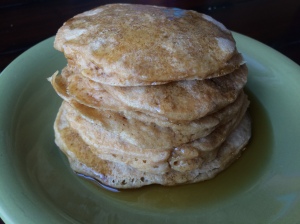
We make pancakes almost every Sunday and we’ve always used the same recipe, but last month we tried out a new recipe, which is similar to the old except that it has quite a few more eggs, and we LOVED it! We’ve made it several times since then and we’ve decided these have a better consistency and texture than our usual pancake recipe. These are lighter, fluffier and a lot more filling :). My kids can only eat one of these pancakes and Scott only 2, whereas he used to have 3 or 4.

2016-03-07 17.47.19

The original recipe requires you to have the batter sit overnight, but I’ve found that if you didn’t prepare, they still are great cooked up immediately, or if you have a little time, put the batter in the fridge for 30 minutes before cooking. Once the pancakes are done, feel free to top them with whichever of your favorite pancakes toppings; we love warm pure maple syrup, butter or peanut butter, and fresh fruit is great too, especially strawberries, blueberries and bananas! Enjoy!

THE RECIPE:

The Best Whole Wheat Pancakes (adapted from Gwyneth Paltrow’s pancakes)
*yield: about 3 dozen 5-inch pancakes

3 c whole white wheat flour
1/4 c granulated sugar, turbinado or coconut sugar work well too (or 2 Tbsp pure maple syrup)
1 Tbsp + 1/2 tsp baking powder
2 tsp sea salt
3 c buttermilk (or almond milk; to make buttermilk measure 3 Tbsp lemon juice in liquid measuring dish and then add enough milk to get to the 3 c mark)
6 Tbsp butter or melted coconut oil, plus more for cooking
6 large eggs
up to 1/2 c milk, as needed, to thin batter
Pure maple syrup, warmed,  for serving
more optional toppings: peanut butter, butter, sliced strawberries, sliced bananas, blueberries, whipped cream

Whisk the dry ingredients together in a large bowl. Whisk the buttermilk, butter and eggs together in another bowl. Add the wet ingredients to the dry ingredients, whisking just enough to combine (small lumps okay). Let the batter sit, covered, overnight if possible. The next morning heat the griddle or your favorite nonstick pan and slick it with a little coconut oil or butter. Add enough milk to the batter to thin it to the right consistency — the thicker the batter, the thicker and heavier your pancakes; the thinner the batter, the more delicate your pancakes. Cook the pancakes on the griddle(I set mine to about 300 degrees), flipping them after bubbles appear on the surface of the uncooked side. Let cook 2-3 minutes more, then remove and eat with warm maple syrup or whichever of your favorite pancake toppings.

Leave a comment

Filed under Breakfast