Monthly Archives: July 2012

Pina Colada Sherbet

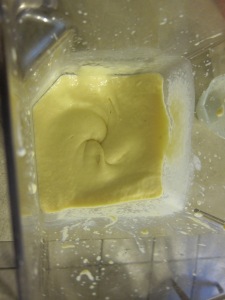
I like having a refreshing and light treat, especially in the summer months. This one is perfect and super fast to make. Coconut milk and frozen pineapple and ice are the main ingredients, with a little agave and lime juice and 1/2 a banana. The lime is wonderful and really makes this feel more like a sherbet flavor.  I buy the canned coconut milk on the Asian food aisle which is really thick. Make sure you read ingredient labels because not all canned coconut milk is the same and you want the one with least amount of ingredients and least additives. The consistency is creamy and smooth. Even though it’s soft, it’s not liquidy soft, more like soft-serve soft(if that makes sense), and once you blend it up, you’ll find that if you turn your blender upside down, the sherbet won’t slide out unless you use a spoon to pull it out.

THE RECIPE:

Piña Colada Sherbet
Serves 2 (or 4 small servings)
Ingredients:
⅔ C  coconut milk (I usually use the canned coconut milk found on the Asian food aisle)
½ small banana
1 Tbsp fresh lime juice
1 Tbsp agave
2 1/2 C frozen pineapple chunks (can also use frozen tropical fruit blend with papaya, pineapple, mango and strawberries)
6 ice cubes, or about 1 C

Add ingredients to high powered blender in order listed. Blend until smooth. Serve immediately(you can also freeze leftovers in ice cube trays or small individual bowls/tupperware for later).

Leave a comment

Filed under Desserts, vegan

Honey Oat Muffins

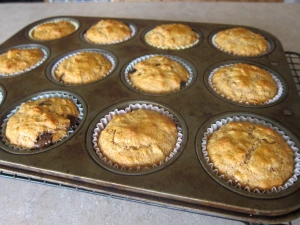
This is another recipe I adapted from Jillian Michael’s cookbook. These muffins are amazing! And 100% whole wheat with no refined sugars! I always make several different variations so that everyone in the family can have the kind they like. A couple of my kids prefer plain oat and honey, a couple really like the carob chip ones (or you could do chocolate) and Scott and I like all the varieties, though I tend to lean toward the raisin and pecan flavor.

Muffins are a great, grab-and-go food. I doubled this recipe this past week and froze half in a freezer gallon ziploc bag so we have some to bring on our upcoming road trip from Utah to Seattle(we make this trip every year). Having been on enough road trips in the past, I’ve learned that I need to prepare good, healthier snacks otherwise I feel like crap all day and the following day from all the packaged snacks we’d pick up at gas stations or quick fast food runs. Ugh. I’m also making granola bars, wheat bread and green smoothies to bring on the trip and I’ll buy some nuts and trailmix as well. I can’t wait!

This recipe is pretty simple. You mix together your dry ingredients:

Then mix up the wet and combine. Do you see that white blob in the middle of the picture below? Yeah, that’s coconut milk. I buy coconut milk in the cans(found on Asian food aisle) and it’s a bit thicker than the refrigerated kind, but either would work fine. You can use your favorite milk in place of coconut milk; I’ve used and loved rice, almond and cows milk.

There is enough batter to fill these muffin papers about 3/4 of the way full. Before I added in the carob chips and nut/raisins, I filled up several papers with the plain honey and oat. Then I took half of the batter that was left and put it in the mixing bowl I used to mix up the wet ingredients, that way I could make some carob chip and some raisin/nut without dirtying more bowls than necessary.

THE RECIPE:

Honey Oatmeal Muffins: carob/chocolate and raisin pecan variation

makes 12 muffins

1 1/2 c whole white wheat flour

1 c rolled oats

1 tbsp baking powder

1/2 tsp baking soda

1/2 tsp salt

1/2 tsp ground cinnamon

1/2 c coconut milk (or your favorite milk: cows, almond, rice etc)

1/3 c honey

1/4 c olive oil

1 large egg

variation 1: 1/2 c carob chips or chocolate chips

variation 2: 1/4 c chopped pecans and 1/4 c raisins

Place oven rack in the center of the oven and preheat to 400 degrees. Line a 12 cup muffin tin with paper liners or spray with pam. In a large bowl mix together flour, oats, baking powder, baking soda, salt and cinnamon. In another bowl whisk together the milk, honey, olive oil, and egg. Add the liquid to the dry ingredients and stir just until moistened. Fold in any variations if desired. Spoon mixture into prepared muffin tin. Place tin in oven and bake until toothpick inserted into the center of muffin comes out clean, about 8-13 minutes. Let stand 5 minutes before taking out and placing on cooling rack. Serve warm. Once cooled completely you can store in an airtight container at room temperature for a few days or you can freeze them for up to a few months.

3 Comments

Filed under Breads, Breakfast, Snacks/Sides/Appetizers

PB and Rice Squash Soup

Scott and I have never been big fans of squash. Neither one of us grew up eating squash(we grew up in Seattle and North Carolina; I’m not sure if those locations have something to do with it). I’ve tried a couple of recipes in the past for soups or just plain old cooked squash with a little seasoning, something which many people in Utah enjoy, but every time, we’d force ourselves to finish our serving and then we wouldn’t know what to do with the leftovers because we sure didn’t want to go through eating that again!

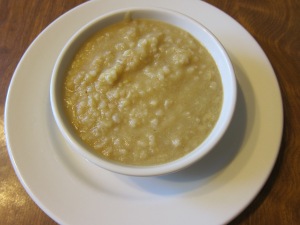
That being said, I’ve gotten several squash in our bountiful baskets over the past month or two and didn’t want them to go to waste. A friend told me of a soup recipe she really liked that used squash. Apparently her whole family liked it which she thought was because it had peanut butter in the recipe which was the dominant flavor. Since we love peanut butter, I decided to give it a try. And I’m SO glad I did! I’ve made it a couple of times now(with a few changes) and my family loves it, well everyone minus Elisabeth(our pickiest eater). My 6, 4 and 2 year old children each had seconds! Wahoo! Who knew that brown rice, peanut butter and squash could taste so good when all mixed together. But it does, and it’s so filling! And think of all the protein, fiber, and vitamins you’re getting in this dish!

If your house gets too hot in the summer when you turn your oven on, like mine does, cook your squash in the morning, or in the microwave. I cook mine in a 350 degree oven for about 45 minutes…just cut the squash in half, scoop out the seeds and then lay it on it’s cut side in a 9×13 dish with about an inch of water in the bottom. You can also cook it several days in advance, scooping out the middle and storing it in your fridge in an airtight container.

Here is a picture of a couple of small acorn squashes I cooked. Once they had cooled a bit(so I wouldn’t burn my hand), I took a spoon and went along the outside edge, scooping out the squash. You can place it right in your blender if you’re making the soup that day, otherwise, into a tupperware to save for later that week.

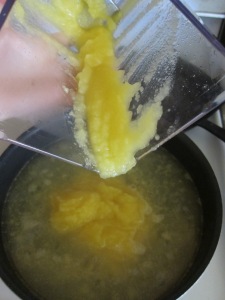
Once you scoop out the squash, stick it in the blender with about 2 c of the broth and blend until smooth. Then pour it into a large sauce pan or rice pan and add the other 4 cups of broth and the remaining ingredients and let it cook until the brown rice is done, about 50 minutes. That’s it. Easy Peasy.

THE RECIPE:

Peanut Butter and Rice Squash Soup

1 large squash or 2 smallish sized ones (I’ve used acorn and butternut)

6 c broth(vegetable or chicken)

1 1/2 c chopped onion or 3 Tbsp dried onion

1/4 tsp crushed red pepper flakes

1 tsp salt

3/4 c uncooked brown rice

1/4 c creamy natural peanut butter

Cut squash in half and scoop out seeds. Place cut sides down in 9×13 dish with about an inch of water and cook at 350 degrees until soft about 45 minutes to one hour. Or, optionally cook in microwave about 5 minutes, also cut side down and in a little water.

Scoop out cooked squash and puree in blender with some of the broth. Transfer to a large pan and add all remaining ingredients. Cook until rice is done, about 50 minutes.

Leave a comment

Filed under Dinner, Soups, vegan

Greek Yogurt Chicken Salad

Have you ever heard of Jillian Michaels? She’s the intense personal trainer on the TV show called Biggest Loser. I’ve never actually seen it, but I’ve heard about it. I have used her work out videos, listened to a couple of interviews with her, and gone through her book ‘master your metabolism cookbook’ and tried out many of her recipes. I like her. I like her ideas on health.

She had a chicken salad recipe in her book that called for greek yogurt instead of the typical mayo. I thought that was brilliant! We tried it out making a couple of small changes and we loved it! Another great summer recipe that doesn’t require you to turn on your oven, uses some fruits and veggies and feels light and fresh.

I like to put my chicken salad on whole wheat sandwich thins or in pitas. Yum!

THE RECIPE:

Greek Yogurt Chicken Salad – lightly adapted from Jillian Michaels

makes about 4 c salad, enough for about 6 sandwiches

1 c boneless, skinless chicken breast, boiled and shredded

1 c halved red grapes

1/3 c chopped pecans

1/3 c plain greek yogurt

1/4 c chopped celery

1 tsp raw honey

1 tsp cider vinegar

1/4 tsp salt

1/8 tsp ground black pepper

12 slices 100% whole wheat sandwich bread, sandwich thins or pita bread


Use two forks to shred chicken in a large bowl. Add the grapes and pecans and toss gently to mix the ingredients. In a small bowl, stir together the yogurt, celery, honey, vinegar, salt and pepper. Pour the dressing over the chicken and toss to coat. Store the salad in a tightly sealed container in the fridge for up to 3 days. To make sandwich, place about 2/3 c of salad in between two slices(or if you don’t want that much bread, put it in a pita pocket or just don’t put a piece of bread on top of your sandwich).

1 Comment

Filed under Dinner, Lunch, Salads

Peanut Butter Popcorn

I am a popcorn lover. And so are my children. How could you not be when your mother makes popcorn almost weekly for your family movie night like I do :). Usually I’ll just make plain old air popped popcorn and that’s it, but sometimes, when we’re feeling like having a treat, we’ll turn it into peanut butter popcorn. You don’t need nasty karo syrup or refined sugars in this recipe. There are only a few ingredients and it’s really easy to remember the quantities because every single one is ‘half’. Half teaspoon this, half cup that so it’s an easy one to memorize.

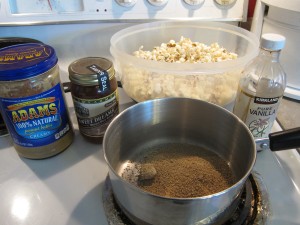
Always try and use an air popper to pop your popcorn. That way there are no oils or additives. Once you have your bowl of popcorn and you’ve taken out any remaining unpopped kernels, put your coconut sugar or other raw sugar on the stove over medium heat and add the brown rice syrup.

When it starts to boil turn on your timer and let it boil for one minute or until it’s a little thicker but not stiff(may only need 45 seconds so watch it and stir constantly). Remove the pan from the heat and stir in your natural peanut butter. Last, add in some vanilla. Stir it together quickly and then immediately pour it over the top of your popcorn and stir it well to combine.

Enjoy!

THE RECIPE:

Peanut Butter Popcorn

1/2 cup popcorn Kernels (pop in air popper. This is equivalent to about 1 bag microwave popcorn)

1/2 c brown rice syrup

1/2 c coconut sugar (or sucanat or other granulated sugar)

1/2 c natural peanut butter (can use creamy or crunchy; personal preference)

1/2 tsp vanilla

Place popped popcorn in a large mixing bowl and spoon out any unpopped kernels. In a medium saucepan, bring coconut sugar and syrup to a boil and boil for 1 minute. Remove from heat and add peanut butter. Stir until melted. Add vanilla. Pour over popcorn and mix well.

4 Comments

Filed under Desserts, Snacks/Sides/Appetizers, vegan

Thai Peanut Linguine Salad

Have you ever checked out the website http://www.ourbestbites.com ? If not, you should. They have lots of amazing recipes on there with picture tutorials. I’ve made many of their recipes, usually just tweaking a couple of things to make it a little more ‘real food’ appropriate. This is one of those recipes. I love this salad. You can have it as a side dish or for a lighter main course. It’s the perfect summer dish because not only does it have a cooling effect, but it features tons of veggies you could grab from your garden, or buy cheap during the summer. Here’s a picture of what you’re going to need for the peanut dressing:  natural peanut butter, olive oil, salt, crushed red pepper, Braggs Liquid Aminos, sesame oil, rice vinegar, garlic, cilantro, ginger, lime juice and honey. I know that seems like a lot, because it kind of is, but it only takes a few minutes to make this dressing. I sometimes use already minced garlic if I don’t have any fresh on hand or if I’m lazy :), same goes with limes vs lime juice. And be sure you use natural peanut butter and if possible, raw honey.
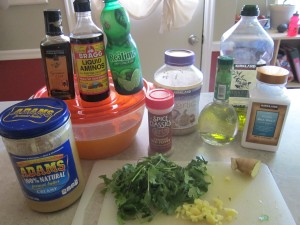
Throw all that stuff in your blender and mix it up til it’s smooth. You can add a few tablespoons of water if it’s not thin enough for your liking.
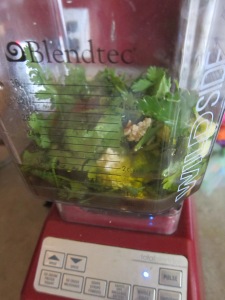
This is what it’ll look like: creamy, smooth and light green in color

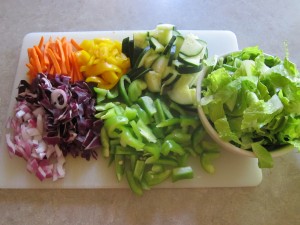
Stick your dressing in the fridge and then start boiling water for your linguine(follow the package directions). While you’re waiting for your noodles, wash and chop your veggies. Feel free to use whatever you have in your garden or what’s on sale at the stores. This salad would taste great with a variety of chopped veggies. I have a couple of different colors of bell peppers, carrot sticks, red onion, purple cabbage, cucumber and some salad greens on the side. I keep the salad greens on the side and add them to individual plates so the leftovers don’t get soggy.
Once your noodles are done cooking, drain the water and then rinse the noodles well with cold water. In a large bowl mix together your noodles, veggies, and dressing(and optional chicken) and you’re all set!

THE RECIPE:

Thai Peanut Salad Dressing
1/2 C natural peanut butter (I like Adam’s Creamy)
2 Tbsp lime juice or 1 lime, juiced
2 1/2 t sesame oil
1 T rice vinegar
2 T Braggs Liquid Aminos
3 T honey(preferably raw)
2 cloves garlic, chopped
1 T ginger, peeled and minced
1/2 C roughly chopped cilantro (stems and all)
1/2 C extra virgin olive oil
1/4 t salt
1/4 tsp crushed red pepper flakes
2-4 T water

Combine all ingredients in a blender(minus water which you will only add if you need it to achieve a thinner consistency) and blend until smooth.
Thai Peanut Linguine Salad

8 oz Linguine (preferably whole wheat)
4 C shredded greens: can use cabbage, romaine lettuce, spinach
2 C thinly sliced purple cabbage
1/2 red bell pepper, thinly sliced (orange or green works too, but this is nice for the rainbow effect)
1/2 yellow pepper, thinly sliced
1 medium carrot, cut into thin, short sticks
1/2 medium cucumber, halved and sliced
1/4 of a red onion, thinly sliced
optional: 3 C diced grilled chicken
roasted peanuts (about 1/2 cup)

Make dressing ahead of time and store in fridge. Bring pot of water to a boil, add linguine. While noodles cook, chop veggies. When noodles are done, rinse with cold water until cool. Put veggies(minus salad greens), optional chicken and noodles in bowl and pour dressing over top. Add peanuts and salad greens on top of individual plates so their leftovers won’t turn soft and limp.

1 Comment

Filed under Dinner, Lunch, Salads, vegan