Monthly Archives: November 2012

Linguine With Pesto Sauce

Thanksgiving was nice; we had a fun time being together with our family all day and eating foods we don’t normally eat.  We over ate a bit and I got sick from eating pumpkin cheesecake every day for several days, but it’s gone now so I’m on the mend :). Now we’re getting back on track to our healthy and good-portion-sized eating….until Christmas Day :). Then we’ll feast for a day and get back on track once again. This meal is fresh and not too heavy which you might appreciate after the Thanksgiving holiday; and it’s one of my personal favorites!

Have I ever mentioned that my husband served a mission for our church in Italy about 12 years ago? Well he did and so we eat a lot of Italian foods in our house and he is an amazing Italian chef. His sauces are so yummy! And what is it with men and spices? I swear he can just throw in a bit of this and a dash of that without referring to any sort of recipe, and it tastes phenomenal.

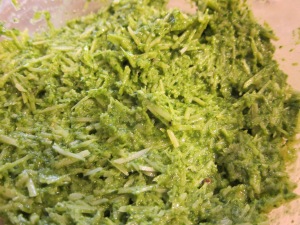
Okay, let’s get started. Above are your ingredients. I used grated Parmesan cheese(do not use powdered) because I didn’t have a fresh block. I buy the already minced garlic from Costco which I keep in my fridge for quicker meal prep. The pine nuts I also buy from Costco because that’s the cheapest I’ve found them, but if you’ve ever bought pine nuts before you know they’re not cheap. This recipe only calls for a few tablespoons of pine nuts so the Costco bag will last you awhile. You can store them in your fridge if you think you won’t use them up for several months.  Combine all of the ingredients, minus the cheese and noodles, into your food processor or blender and blend until smooth. I used a food processor; if you use a blender you’ll most likely have to stop several times and scrape down the sides, and you might get mad and start saying unkind things under your breath… just thought you should know; but it will do the job still. (You can freeze it at this point in an ice cube tray for later use if you like.)

Dump into a medium sized bowl and add in the Parmesan cheese. Stir to combine.
Bring a pot of water to a boil, add your linguine noodles and boil according to package directions. If your family likes whole grain or whole wheat noodles, do those, if not try the noodles that are 50% whole wheat…remember, you want your family to eat this so if you  do half and half, that’s great too. Take 4 tablespoons of the water and add at to the pesto sauce(if you forget to do this, it’s okay), then drain the rest of the water, put in a large bowl and mix with the pesto sauce. And it’s all ready! Yummy, healthy and fast! And good as leftovers. When you warm it up in the microwave the following day, the cheese will melt a little and make it even better….and/or if you put the pesto sauce on hot pasta, same thing will happen. Enjoy!

Linguine with Pesto Sauce

3/4 c fresh basil leaves

3-4 cloves garlic, peeled

3 Tbsp pine nuts

1/2 tsp salt

1/4 tsp ground black pepper

5 Tbsp olive oil

2/3 c freshly grated Parmesan cheese (or just grated if you don’t have it fresh but the powder will not do)

1 1/4 lb linguine

serves 5-6

Place the basil, garlic, pine nuts, salt, pepper and olive oil in a food processor or blender and process until smooth. Remove to a bowl. (If desired the sauce may be frozen at this point, before the cheeses are added). Stir in the cheese. Cook the pasta in a large pan of rapidly boiling salted water until it is al dente. Just before draining it, take about 4 Tbsp of the cooking water and stir it into the sauce. But if you forget, that’s okay because I forget to do this step a lot and it still tastes great. Drain the pasta and toss with the sauce. Serve immediately.

You can freeze any spare pesto sauce in an ice cube tray

Leave a comment

Filed under Dinner

Molasses Spice Cookies

Can you believe Thanksgiving is tomorrow? Holy Hannah, how the time flies! I have to keep telling myself to relax and just take one day at a time(not just about Thanksgiving but everything in general). Which is great advice except when you need to prep things ahead of time… if I did all of my Thanksgiving cooking on Thanksgiving, the turkey wouldn’t be as juicy, and I definitely wouldn’t get any pies or rolls made when I still had to make sweet and mashed potatoes and green beans and cranberry sauce and salad and on and on. But I did write on my calendar what I needed to make on specific days in order to stay on top of things. For example, I made our whole-grain rolls last week. We had some for dinner and then I froze about 40 balls of dough which we’ll pull out Thanksgiving morning. Today I’ll be making our pumpkin cheesecake; and I’m not gonna lie, it’s not all real foods…there just might be a Lorna Doone shortbread cookie crust. But I’m okay with that because most everything else is whole/real foods. Tonight we’ll put our thawed out turkey in a brine to soak overnight. So tomorrow, on Thanksgiving, that’ll leave us with the potatoes and veggies and actual cooking of the turkey which doesn’t seem quite so overwhelming. One day I’ll get some of our favorite Thanksgiving recipes on here, but it probably won’t be until next year, after I’ve photographed Turkey Day at our house from this year. But, let me share that my husband and I recently watched a Thanksgiving Holiday Special with Chef Brad (he fuses grains with every day foods) and we loved what he did with the turkey, amongst other things. So if you need some last minute ideas and want to watch that today, you can view it on BYUtv here.

That being said, Molasses Spice cookies are one of our favorite treats to eat during the Fall and Winter seasons. I love the smell and flavor! This particular cookie is made with whole white wheat and brown rice flour, though you could do all whole wheat flour and I have done it that way several times…I just like to get a couple of grains in if possible and the brown rice flour lightens the cookie just a little so it’s not as dense as all whole wheat. This cookie is a flatter cookie but it’s so chewy and soft that we love it right out of the oven and days after…if only it would last that long in our house!

You can use a variety of sugars; I personally like Sucanat or Coconut Sugar which I use, many times, in place of brown sugar in dessert recipes because they are an unrefined sugar. I also have evaporated cane juice which is that organic sugar you’re seeing in the picture above (can buy at Costco), but I don’t use it very often because it’s not much better than refined sugar; it’s a little less refined which is why it’s the tan color instead of white.

Alright, let’s get started! Line a cookie sheet with parchment paper so you’re cookies come off easily. Preheat your oven to 375 degrees. Grab a small, shallowish(like my new word?) bowl and put 3 tablespoons of the evaporated cane juice sugar inside. This is what you’ll use to roll your cookies in. Set it aside and grab a medium sized mixing bowl; add your flours, soda and salt to this bowl, give it a quick stir and set aside.

In a small saucepan over medium heat, melt your butter and add your spices until it has a nice smell, about 1 to 2 minutes. Transfer this to a large mixing bowl and let it sit for a couple of minutes to cool off a bit. Whisk in your remaining three tablespoons of sugar, coconut sugar, molasses, egg yolk and vanilla. Make sure to put the egg yolk in after you’ve stirred in the sugars you don’t cook the egg.

Stir in your flour mixture until combined. If you have a cookie dough scoop, use that, otherwise dish out a heaping tablespoon at a time, roll it into a ball with your hands, roll it in the sugar you’ve set aside in a bowl, and then place it on your parchment covered cookie sheet about 2 and 1/2 inches apart. Bake the cookies, one sheet at a time, until the edges are set and beginning to brown but the centers are still soft, puffy and underdone, about 9 to 12 minutes, rotating the baking sheet halfway through the baking.

Let the cookies cool on the baking sheet for 10 minutes, then serve warm or transfer to a wire rack and let cool completely. You can store these in a cookie jar or an airtight container for several days. They’ll stay nice a chewy!

Molasses Spice Cookies – by Elisa Smith

6 Tbsp evaporated cane juice, divided (or other granulated sugar)

3/4 c whole white wheat flour

1/3 c brown rice flour (can use white flour or all whole wheat flour)

1/2 tsp baking soda

1/8 tsp salt

6 Tbsp unsalted butter

3/4 tsp ground cinnamon

3/4 tsp ground ginger

1/4 tsp ground cloves

1/8 tsp ground allspice

1/8 tsp pepper

1/4 c light or dark molasses

3 Tbsp coconut sugar(or other granulated sugar)

1 large egg yolk

1/2 tsp vanilla extract

Adjust an oven rack to the middle position and heat oven to 375 degrees. Line baking sheet with parchment paper. Spread 3 Tbsp sugar in a shallow dish for rolling; set aside. Whisk the flours, baking soda, and salt together in a medium bowl and set aside. Melt the butter in a small saucepan over medium heat. Stir in the cinnamon, ginger, cloves, allspice, and pepper and cook until fragrant, 1 to 2 minutes. Transfer the butter mixture to a large bowl and let cool slightly. Whisk the remaining 3 Tbsp sugar, molasses, coconut sugar, egg yolk and vanilla in to the melted butter until smooth. Stir in the flour mixture until combined. Working with 1 heaping tablespoon of dough at a time, roll the dough into balls with wet hands, then roll in the sugar to coat. Lay the balls on the prepared baking sheet, spaced about 2 1/2 inches apart. Bake the cookies, one sheet at a time, until the edges are set and beginning to brown but the centers are still soft, puffy and underdone, 9 to 12 minutes, rotating the baking sheet halfway through the baking. Let the cookies cool on the baking sheet for 10 minutes, then serve warm or transfer to a wire rack and let cool completely.

Leave a comment

Filed under Desserts

Creamy Tomato Soup

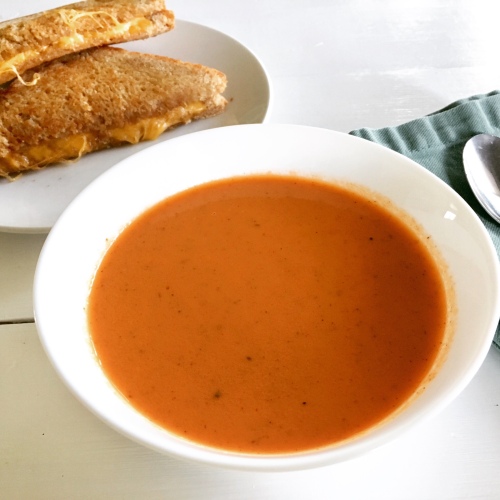
Growing up, I refused to eat tomato soup. Not even with a sandwich dipped inside. I’m not sure exactly what it was, maybe it was how runny the soup looked, or the thought of a tomato based dish…I’m not really sure, but either way, I didn’t want to have anything to do with it. About a year ago I was reading recipes (a favorite pastime) and read through a tomato soup recipe that sounded like it’d be thicker than your typical really runny soup and so I thought I’d give it a try, making a few small adjustments of my own. Since then we’ve made it several more times because my family loves it! My kids won’t just go to town slurping up their soup, but they nearly finish their bowl by dipping their whole wheat sandwich inside, and I’m cool with that :).

Start off by heating your olive oil in a large sauce pan over medium heat and slicing up your onions. They can be big slices because you’re going to throw them in the blender anyway. But we want the full flavor so don’t skip this step. Add your garlic.

Once they’ve softened up a bit, you’ll add in your tomatoes and spices, bring it to a boil and cook it for about 5 minutes until your veggies are tender.


Dump or spoon your tomato mixture into a blender (but be careful because it’s super hot) and blend until smooth. Then return the now smooth tomato mixture back to your saucepan, stir in the coconut milk (or heavy cream), and broth and serve.

We like to eat this soup with grilled cheese sandwiches made on whole wheat bread. My husband and I like to add tomato slices, pesto and avocado to our mozarella cheese sandwich. The kids prefer just plain cheddar cheese melted on bread.

This soup also great as a leftover; I save it in a mason jar and have it during the week for a quick, yummy, warm lunch.

THE RECIPE:

Creamy Tomato Soup- vegan
*serves 6-8

1 Tbsp olive oil
1 white onion
1 clove garlic, cut up or 1/2 tsp garlic powder
1/2 Tbsp Italian Seasoning
1 Tbsp dried basil leaves
1/4 tsp dried oregano
1/2 tsp salt
1/4 tsp ground black pepper
2 (14.5 oz) cans diced tomatoes, undrained
1/2 can coconut milk (full fat, I like Thai brand)  or 1/2 c heavy cream
2 c vegetable broth

In a saucepan over medium-high heat, saute onions and garlic in olive oil. Add spices and stir together, allowing it to sit for a minute. And tomatoes and cook together for a few minutes. Turn off heat. Pour into blender and blend until smooth. Return to saucepan and stir in coconut milk and broth. Simmer for 5 minutes on low to medium low heat. Serve with grilled cheese sandwiches and salad.

1 Comment

Filed under Dinner, Soups

Chocolate Chip Pumpkin Bread

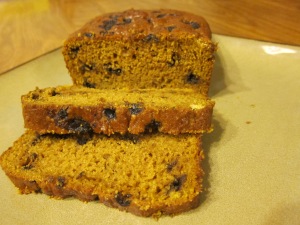
I love making pumpkin bread during this time of year. It makes our home smell wonderful and it makes it feel more like Fall, even if it is still 70 degrees outside in November.

Though I have a good agave pumpkin bread recipe, this pumpkin bread version contains sugar;  granted it’s evaporated cane juice and coconut sugar, but still. There are quite a few ingredients in this recipe, which you’ll see pictured below. This pumpkin bread is so moist and wonderful, and is still good a couple of days after baking. You can also freeze a loaf in a gallon freezer ziploc bag if you don’t want to have both out at once and it tastes fantastic once thawed.

You can make this bread using all whole white wheat flour, but for optimal yumminess, I use one cup of brown rice flour which I grind in my nutrimill, or you can grind it up in a high power blender; this makes the bread a little lighter in texture.

Preheat your oven to 350 degrees. Take out your loaf pans (I use 2, 9-inch pans but you could use several mini pans too, which would make great gifts! Or you could use muffin tins) and spray them with Pam. Take a napkin and wipe around the top 1/2 inch of the pan. This will allow your bread to bake flatter, rather than with a mound in the middle because instead of the bread rising up and then the edges slipping down the sides, the ungreased top part of the pan will keep the bread from slipping back down.

In a medium sized mixing bowl, whisk together your flours and other dry ingredients(spices, baking soda, powder and salt); At this time, also set aside your chocolate chips in a bowl and mix in a teaspoon of flour to help the chips stay suspended during baking rather than falling to the bottom.

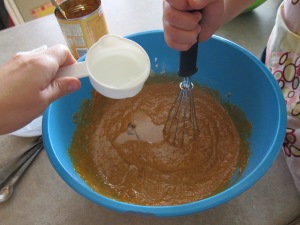
In a larger mixing bowl combine your sugar, oil, pumpkin, yogurt, eggs and vanilla. If your coconut oil is solidified, spoon 1/2 cup into your measuring cup and then put it in the microwave for about 30 seconds, until melted and then add it to your bowl. Whisk all your wet ingredients together and then add the dry ingredients, mixing until just combined. Add the chocolate chips, leaving about a Tbsp in the bowl that you can sprinkle on once it’s in the pan. Stir together.

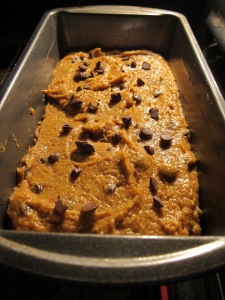
Pour your batter into your greased baking loaf pans, sprinkle with the remaining chocolate chips and place in your preheated oven for about 45-55 minutes or until a toothpick inserted in the middle comes out pretty clean, with a few crumbs clinging.

Allow to cool in pan for about 10 minutes.

Slide a knife around the edge and then flip onto a cooling rack and allow it to cool completely before serving. Or if you’re like me and my kids, cut it while it’s still hot, blow on it for a few seconds and then put a slice in your mouth and use your hand as a fan to help cool your mouth down :).

Sweet breads are one of my older kids favorite after school snacks. When they walk in the door and can smell this bread, I love seeing smiles spread across their faces in realization! My young children that stay home with me all day enjoy ‘helping’ in the kitchen when we bake breads and they of course love this too. Happy baking!


Chocolate Chip Pumpkin Bread
Recipe adapted from Our Best Bites

2 cups whole white wheat flour
1 cup brown rice flour
2 teaspoons ground cinnamon
1/2 teaspoons nutmeg
1/4 teaspoons ground cloves
1 teaspoon baking soda
1 1/2 teaspoon baking powder
1 teaspoon table salt
1/2 cup coconut sugar or sucanat
1 1/2 cup evaporated cane juice or other granulated sugar
6 ounces(3/4c) greek yogurt
3 eggs, slightly beaten
15 ounce can pumpkin puree
1/2 cup coconut oil, melted
2 teaspoons vanilla extract
1 cup carob chips or sunspire chocolate chips, or  white choc chips (save a few, about a Tbsp, to sprinkle on the top of loaves just before you put in oven)

Preheat oven to 350 degrees.  Grease two, 9-inch loaf pans with nonstick spray and set aside. Can also use mini loaf pans or muffin tins, but will need to shorten cooking times so watch the oven.

In a medium mixing bowl, combine flours  (put a teaspoon in a smaller bowl with the chocolate chips), cinnamon, nutmeg, cloves, baking soda, baking powder, and salt.  Whisk gently to combine and set aside. In a larger mixing bowl combine sugars, yogurt, eggs, pumpkin, oil, and vanilla extract and whisk until smooth.

Slowly add the dry ingredients to the wet and mix together, being careful to not over mix.  Gently stir in chocolate chips.   Divide batter between loaf pans and sprinkle a few extra chocolate chips on top.  Bake for 45-55 minutes or until a toothpick comes out clean with a few moist crumbs clinging. Let cool for 10 minutes in the pan and then run a sharp knife around edge of pan and remove loaves from pan and onto a cooling rack.

Leave a comment

Filed under Breads, Snacks/Sides/Appetizers